
So, what’s the difference between a good and a bad background?
Well, a tree or power pole coming out of your subject’s head would certainly come to mind.
A busy background that detracts from your subject in any way would constitute a poor background.
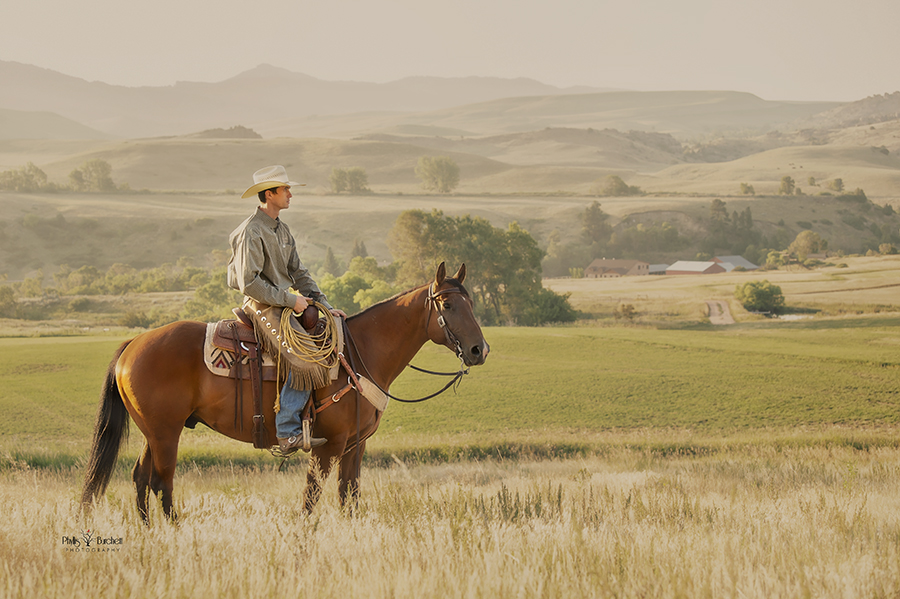
F5 – SS 1/320 – ISO 1600 at 160mm focal length
Simplifying your backgrounds is a way to complement your subject and draw more attention to it. This can be done in a number of ways.
Of course, the easiest way would be to find a location where you can set your subject against a clean background, far enough away from it that, with the use of your aperture, the background will go out of focus. Sometimes, this can be as easy as moving you or your subject just a little.
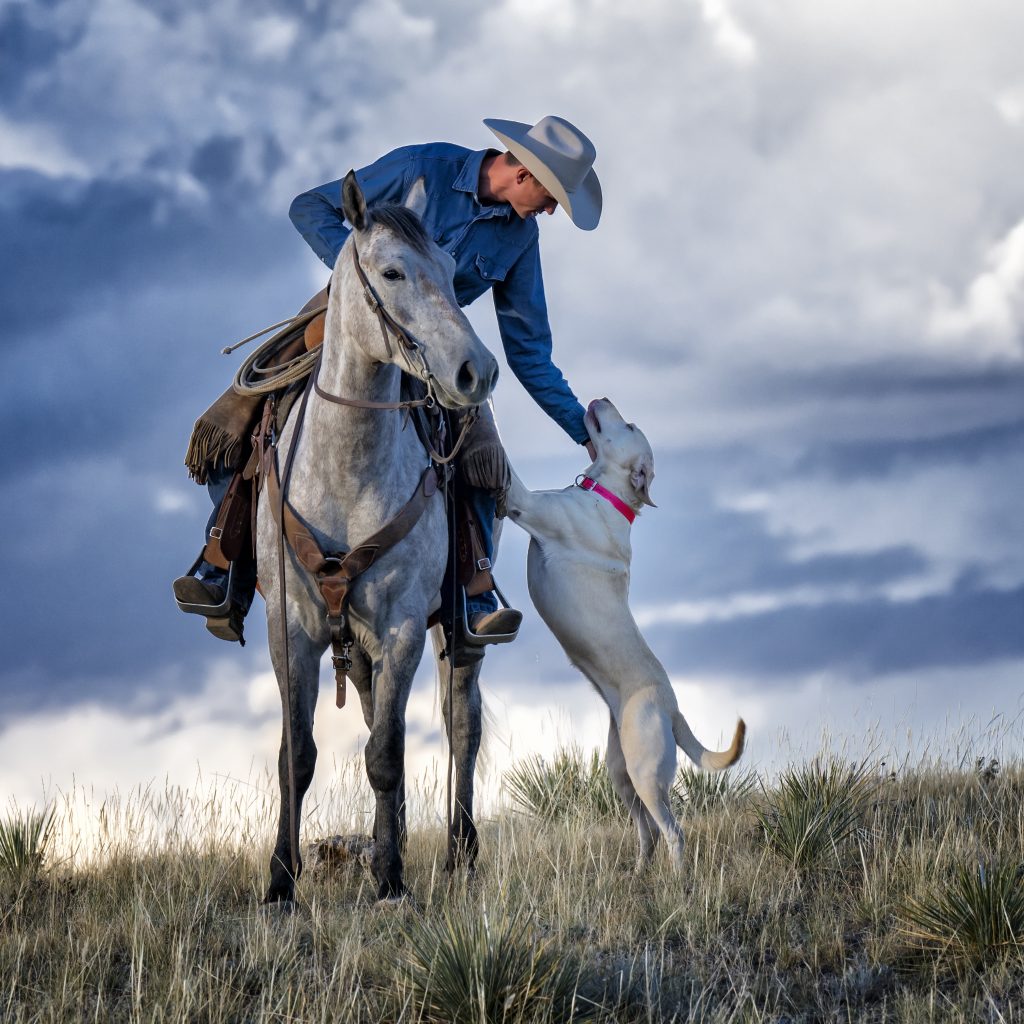
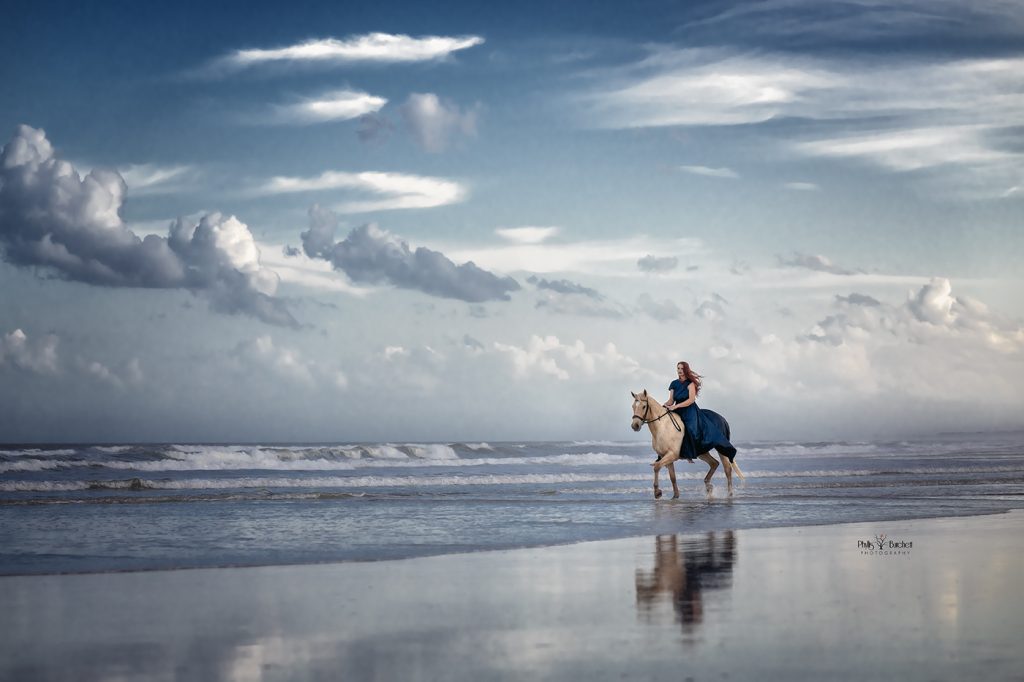
F5.6 – 1/640SS – ISO 640 at 200mm focal length
I love to use the sky whenever possible for my background but prefer there is some texture (clouds).
If you’re lucky and you have a great sunset or a dramatic sky as a backdrop this can help to set the mood for your images.
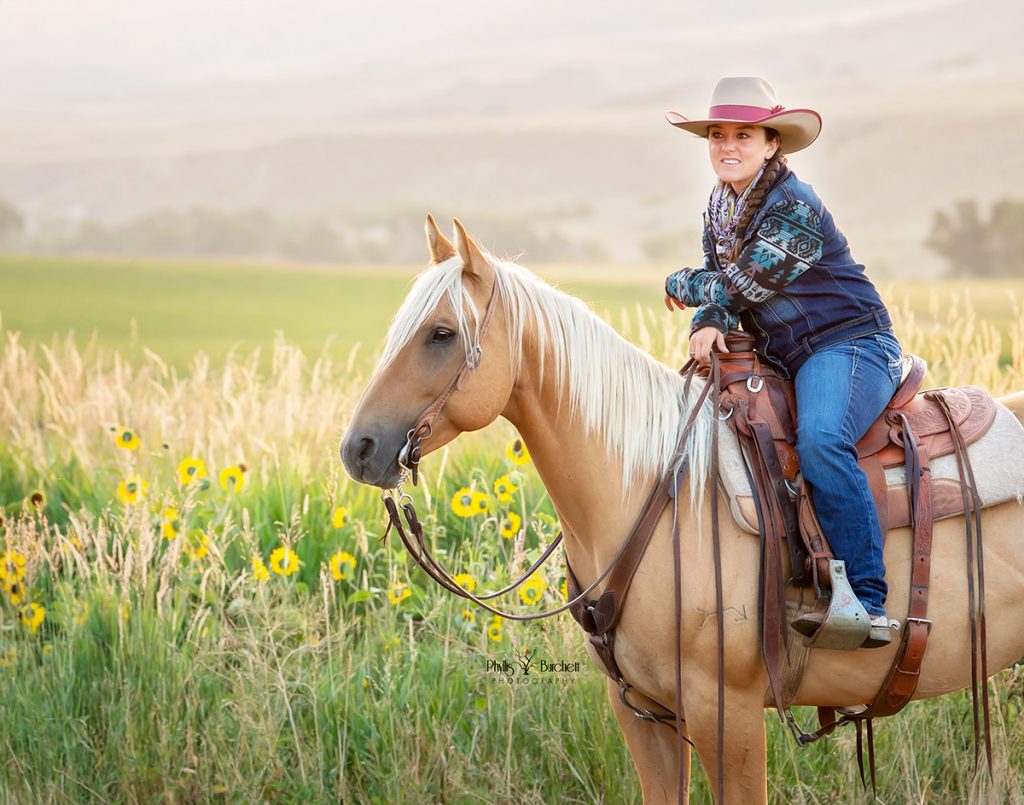
F5.6 – SS 1/400 – ISO 1600 – at 175mm focal length
Using the background to tell a story gives the viewer a sense of place with environmental portraiture. This could be a portrait of a person, an animal, or both.
By using the depth of field preview button, you’ll be able to see the amount of sharpness there is in your subject versus your background. If you don’t know where this button is, look it up in your user manual. It’s a great tool to utilize!
Background separation in photography refers to techniques used to make the subject of an image stand out distinctly from its background. Here, the viewer’s attention is immediately drawn to the main subject, free from distractions in the background.
Achieving good background separation is an important aspect of strong photographic composition.
By blurring or simplifying the background, the subject becomes the clear focal point.
Background separation can give a two-dimensional image a sense of three-dimensionality, making the subject appear to pop out.
A well-separated subject isn’t competing with a busy or cluttered background for the viewer’s attention.
The way the background is rendered can contribute to the overall feeling of the photograph. For example, a soft, blurred background can create a dreamy mood.
There are various techniques to achieve effective background separation:
Depth of Field: This is a primary method, controlled by the lens aperture. A wide aperture (low f-number like f/1.8, f/2.8) creates a shallow depth of field, meaning only a narrow plane of focus is sharp, while the background (and foreground) becomes blurred (bokeh).
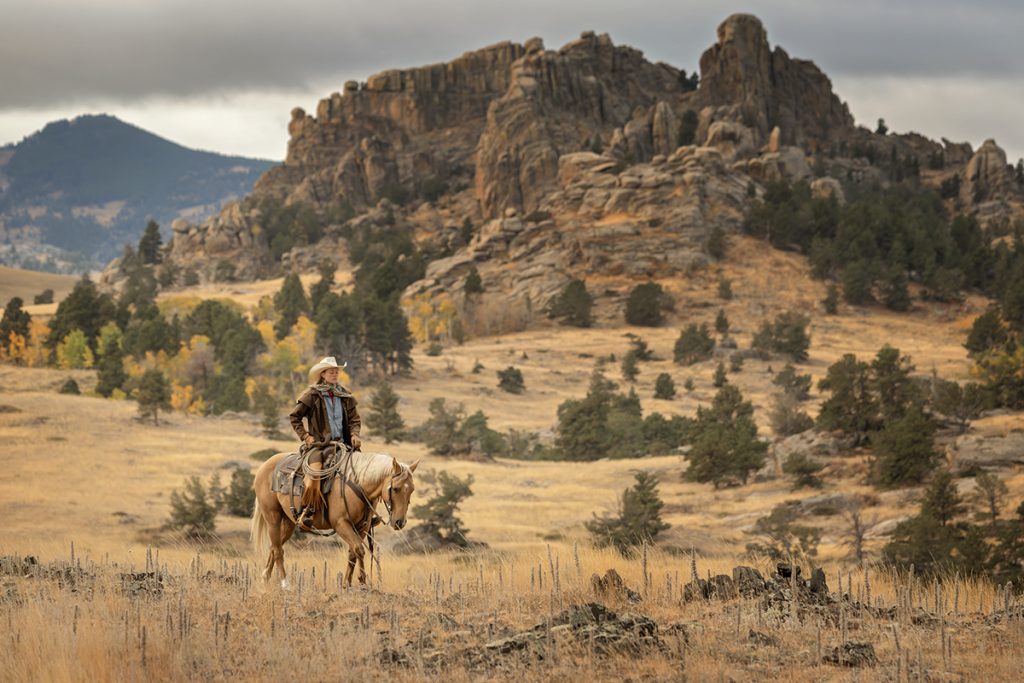
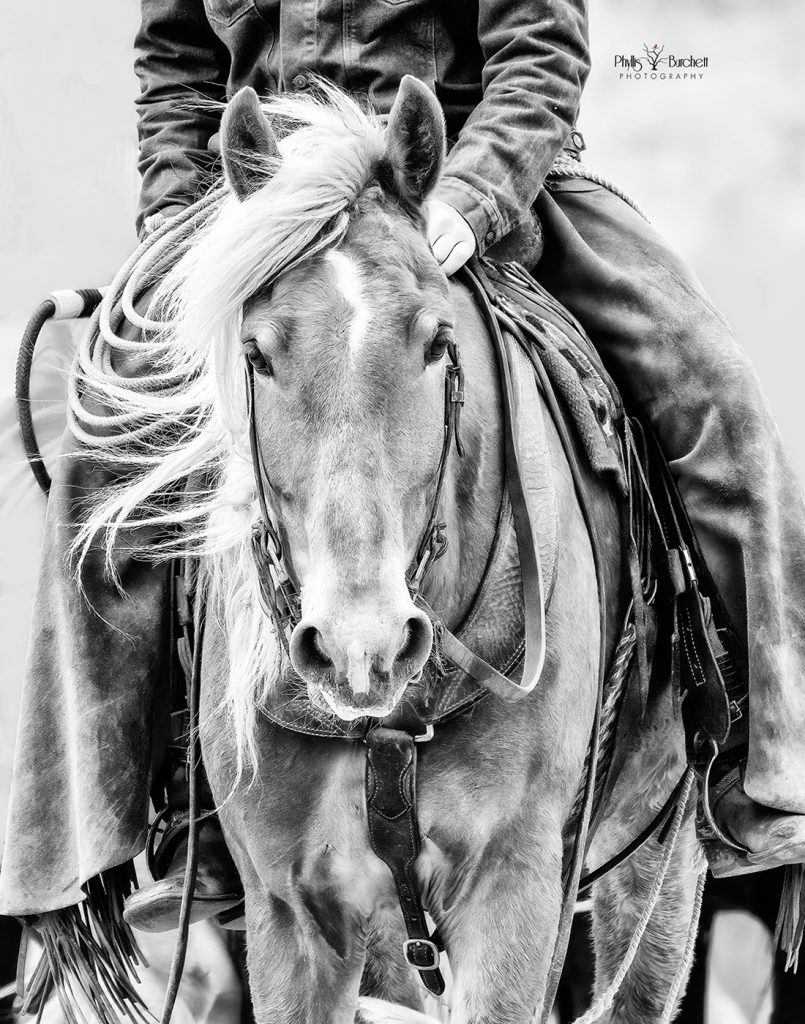
F11 – 1/400SS – ISO 800 – at 200mm focal length
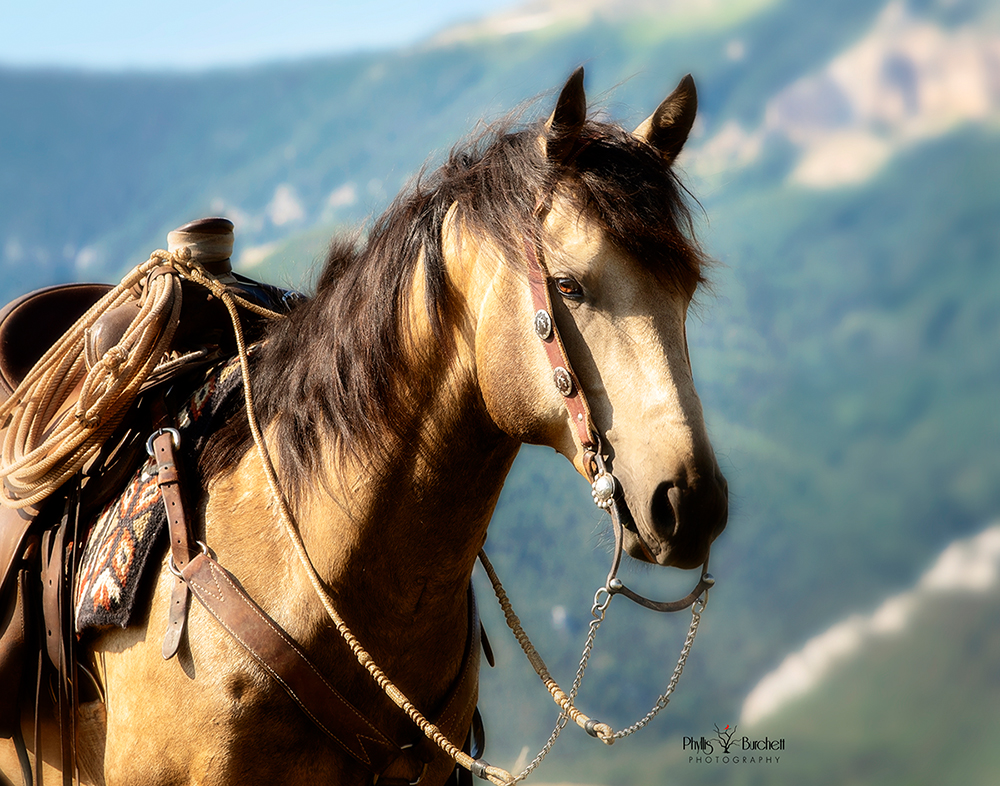
Focal Length: A great way to create separation from your background is to use a long lens. As the focal length increases, the angle of view is decreased. With each step up in a longer focal length, our distance from the lens to the subject becomes proportionally larger than the distance from the subject to the background.
This creates a sort of “flattening†effect, where not only do the background objects appear larger, but it also appears closer to the subject.
F5 – 1/400 SS – ISO 500 at 70mm focal length
Subject-to-Background Distance: Increasing the distance between your subject and the background will result in a more blurred background. The further away the background, the less in focus it will appear.
Subject-to-Camera Distance: On the other hand, moving closer to your subject can also decrease the depth of field, blurring the background.
Using light to create contrast between the subject and the background can help with separation. For example, a well-lit subject against a darker background will naturally stand out. Rim lighting (lighting the edges of the subject) can also create separation.
Backgrounds with contrasting colors or tones to the subject can visually separate them.
F4.5 – 1/1600SS – 400 ISO at 120mm focal length
Using negative space can naturally draw attention to your subject, creating a sense of separation.
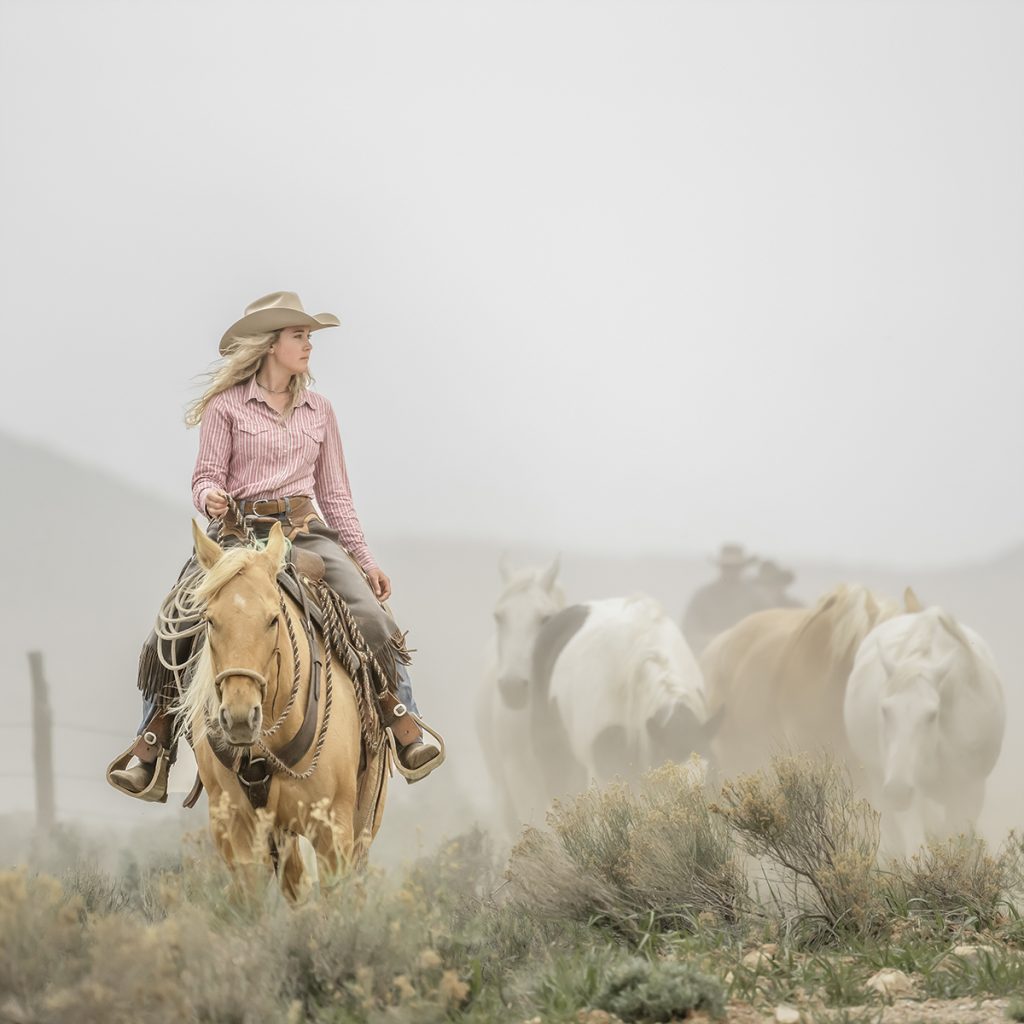
Elements like fog, mist, haze or even dust can naturally blur distant backgrounds, separating the foreground subject.
Filling the frame is a way to eliminate a busy background but be careful not to overlook the edges of your frame.
Post-Processing: While it’s best to achieve separation in-camera, editing techniques like adding a soft blur to the background or adjusting its brightness and contrast can further enhance the effect. Some distractions can also be removed in post-production.
In Lightroom and Camera Raw you can:
• Use the Remove tool (the one that looks like an eraser) to eliminate small distractions from sky, water, or blurred backgrounds.
• Decide when to try Generative AI for trickier fixes — and why it’s best used sparingly, especially for contest images.
In Photoshop, the distraction-removal tools get even stronger:
• The Photoshop Remove tool, better than the one in Lightroom, can clean up ropes, edges, and some complex areas.
• You can work non-destructively by editing on blank layers.
• Content-Aware Fill or Generative Fill.
A few tips to keep in mind when doing this kind of work:
• Zoom out to see if the distraction actually matters
• Leave prompts blank when using Generative Fill
• Mix tools together for a better result — like using Remove for cleanup after a Generative patch
Hope this helps you to think creatively when choosing locations for your equine shoots,
of course sometimes we don’t have the choice but you can still use other means to help your subject be the main focus!
Hi. I am wondering about your use of a wide f/stop such as f/5 for your landscape photographs. Your photographs are beautiful! For the same scenes, I would have used an f/8 or an f/11.
Hi Natalie, If I were doing strictly landscape photography I would have chosen an aperture of F11 but since here my main subjects were horse and rider I chose a wider aperture to let the background go a bit
softer. The only exception was the bridle horse I used as an example of lens compression, I used F11 as I wanted sharpness thru the back of the horse. You could easily have shot most of these at F8 since there
was a good bit of background separation though.