While we don’t get a lot of snow (or any) here in Georgia, winter shooting is one of my absolute favorite things to do. So, here are my personal tips for heading out into that beautiful wintry scene to capture some snow images.
Focus on Contrast
Autofocus can have a hard time when everything is white. It helps to focus on something dark. Your camera’s autofocus system uses contrast to focus, so a mound of white snow may cause issues.
Utilize Camera Settings
If you don’t already, be sure you’re shooting in raw. When you take photos in RAW, you will have more information to work with in editing–JPEG files are compressed, so they don’t allow much latitude.
Choose Evaluative metering (which is called Matrix metering on Nikon cameras). If the weather is really sunny, you may also want to try Spot metering to see if it might handle the light better.
No matter if you are shooting in manual exposure or aperture priority, think about setting your exposure compensation to +1 or +2. Your camera will try to make snow look gray; this will keep the snow looking white. You can also adjust the exposure during editing if needed.
White balance – auto white balance can lead to very blue or very grey snow photography. Your camera doesn’t read the bright white scene properly, and thinks the scene should be grey! If you want to set your WB manually, try it at about 6500k, then make adjustments as necessary. You can also try using the ‘flash’ setting on your WB presets.
Shoot to the “Right†for Winter Photography
If you are shooting in the winter with 90% of your image being white snow, then all those white pixels are going to be added up on the right-hand side. Exposing your images with a histogram that is weighted to the right-hand side will mean all that white snow is captured as light tones, just as it should be.
By shooting to the right, you are telling the camera to overexpose your shot but by doing so, your white snow will be white. Just be sure you are not “clipping†your highlights. *
*Clipping
Clipping simply means that information represented on the histogram goes off the graph. When this happens, there is no information (details) in the pixels in either your highlights or your shadows, it is just pure white or black. Sometimes, this is ok, such as when you are shooting for silhouettes.
Use Your Histogram to Check Exposures
Viewing your images on your LCD screen on your camera can lead to inaccuracies, particularly when out in bright white conditions.
Know how to access and use your histogram to more accurately check your exposure, so you don’t completely blow out the scene and lose detail that can’t be retrieved, even in RAW.
A simple rule is that a correct exposure would have a bell curve with the graph weighted in the middle and therefore, have a good balance between the shadows, highlights, and mid-tones. However, there is no one perfect histogram for all images and if we followed this simple rule for our winter images then all the snow (highlights) would be underexposed.
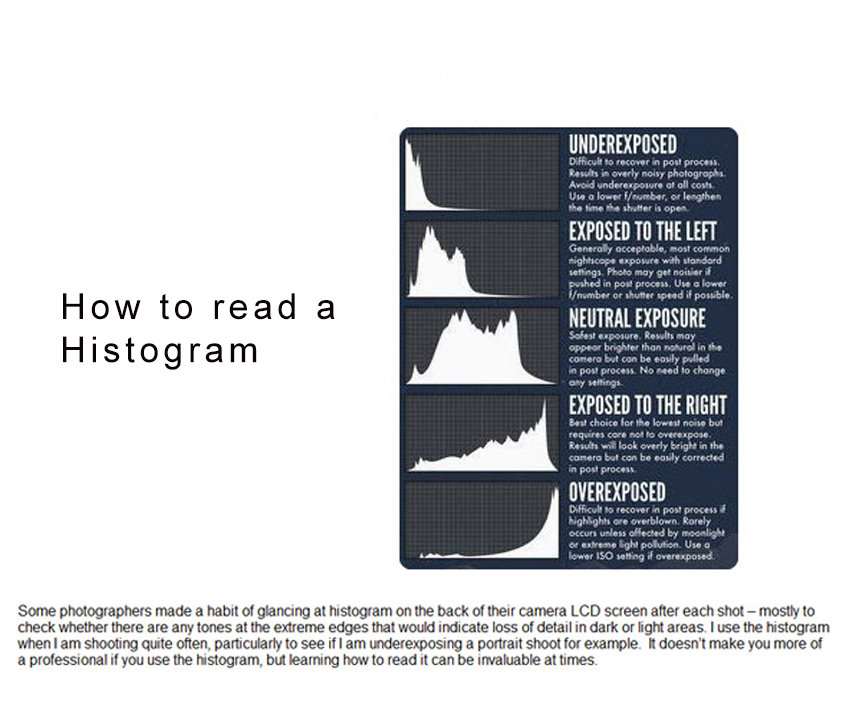
In general, you should try to avoid clipping your highlights or shadows as there is then absolutely no chance of recovering the detail when editing your images. This is why I always use my histogram and/or highlight warning when I’m shooting.
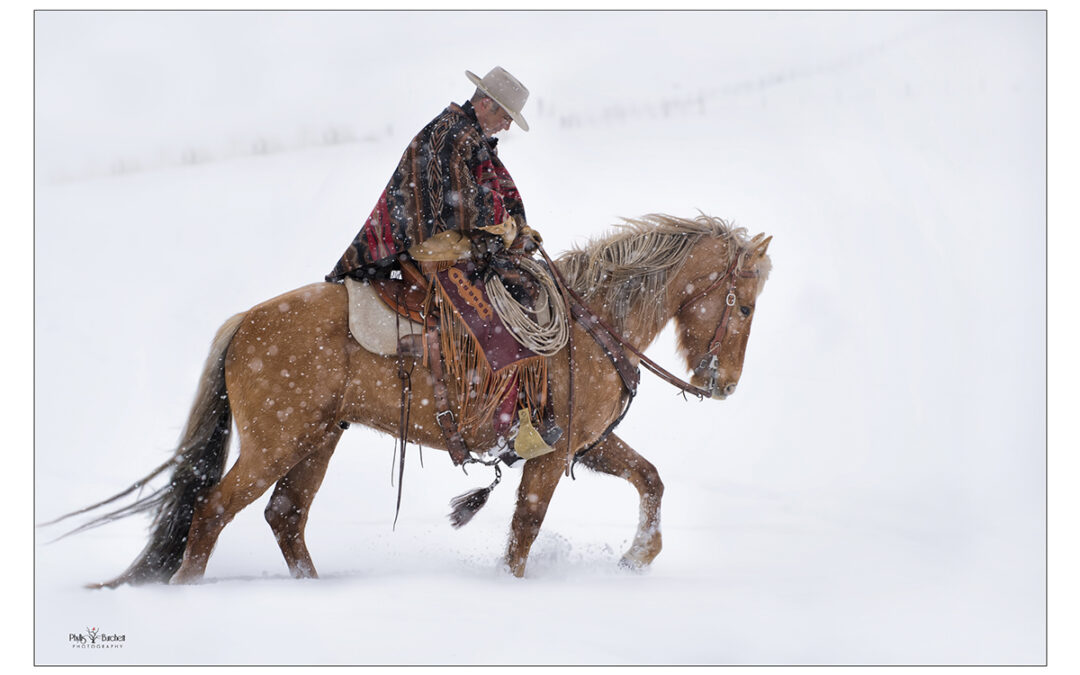
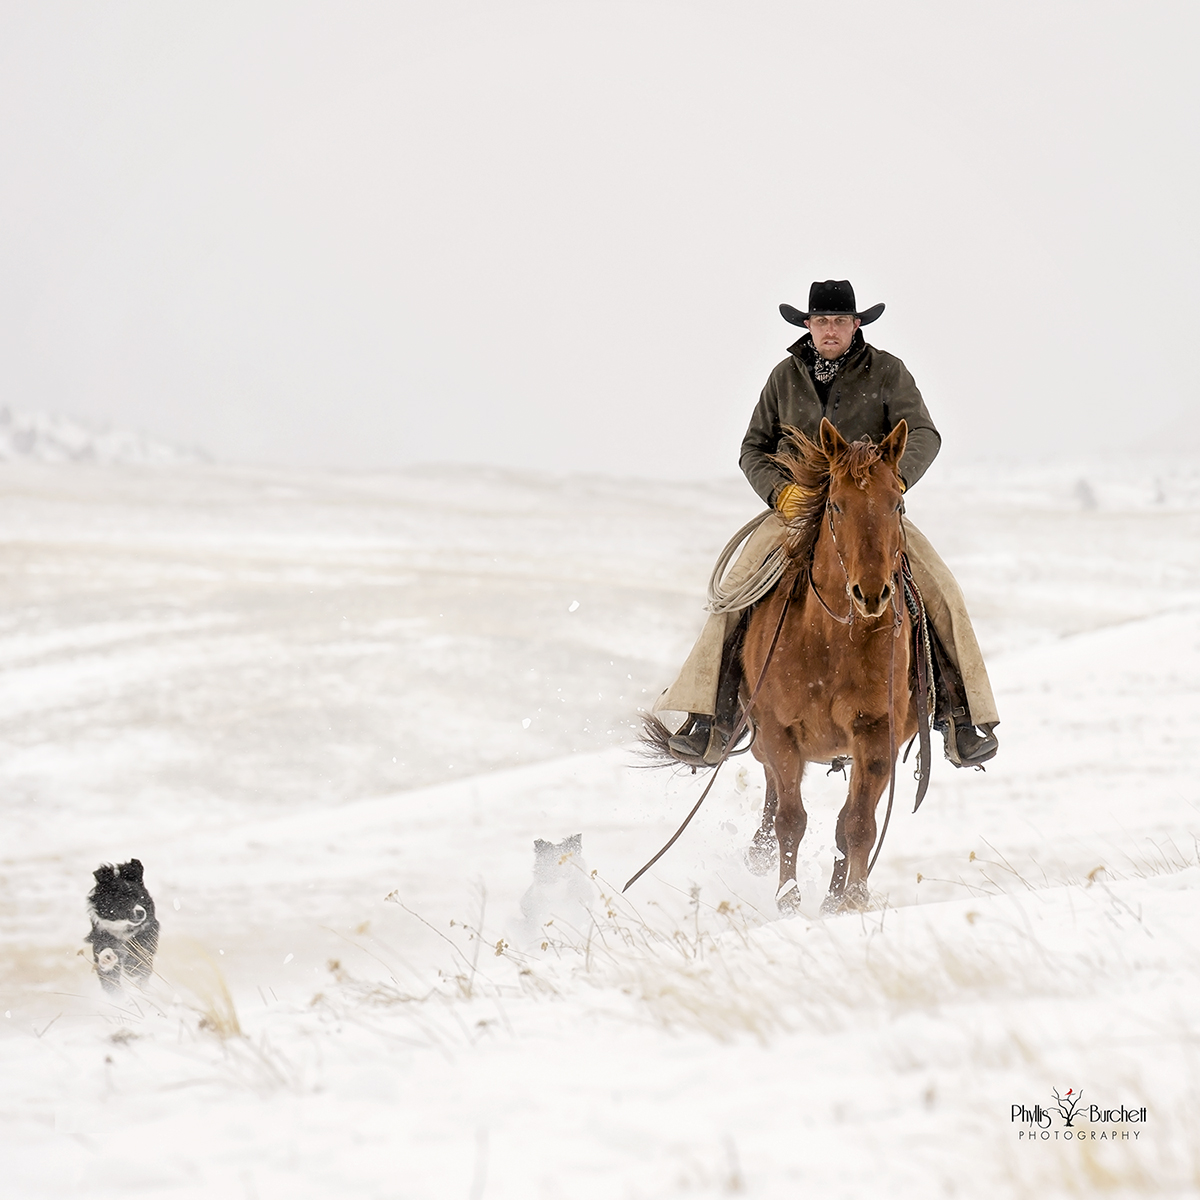
How to Photograph Falling Snow
If you want to show movement in the falling snow then you’ll need a longer exposure, less than 1/100 on your shutter speed. If you’re shooting with a wide angle at 24mm then you should be able to get as low as 1/30 SS.
Remember if there is any other action in your scene moving faster, you’ll need to adjust your shutter speed accordingly. To capture those individual flakes, I would suggest at least 1/250 depending on how hard it’s snowing. A faster shutter speed may better evoke that feeling of falling snow, because if the shutter is too slow, it can begin to create a foggy or blurry-looking image.
Keep Your Batteries Warm!
Batteries can be tricky to keep warm in the wintery temperatures. If they get too cold, they may stop functioning altogether.
Keep a fully charged spare battery a spare or two – and keep them warm by putting them in an inside pocket of your jacket. If needed, put a hand warmer in the pocket with them.
When the battery in your camera runs low, replace it with the warm one. Then put the drained battery in your pocket; you may even be able to use it again once it warms up.
Use the Lens Cap (It exists for a reason!)
To avoid frost and fogged lenses, use your lens cap when you aren’t shooting. Anytime you’re taking a break from shooting or moving from one location to another put your lens cap on.
Take Care of Your Gear Afterward
When you step back indoors to take a break, warm up, or finish up for the day, place your camera and lenses into an airtight bag. If I plan to head back outside, I might even leave it on the porch or garage where it’s not coming in to high temperatures.
If your camera has snow on it, brush it off with a glove, don’t leave it on the camera – it will just turn to water as soon as it gets warm.
I prefer a light-weight roll-top dry bag like those used by boaters to keep their gear dry. Once sealed up tight in a Ziplock or dry bag, condensation can’t form on your gear. Just let your camera warm up to room temperature before you pull it out. Lastly, don’t take the lens off until it’s fully dry – otherwise, you are giving moisture an extra opportunity to get into the camera’s workings.
Watch the Weather and Dress Accordingly
You’ve got to dress right. It doesn’t matter what the light is doing, if you get frost-bite on your fingers, and can’t operate the camera. I can’t stress the importance of layering.
From inside to outside I will be dressed something like this: long underwear, fleece or wool sweater and pants, down or synthetic vest, 800 fill down jacket with hood, windproof Thinsulate pants, two pairs of thick wool socks topped by high quality winter boots, a musher’s style hat with ear flaps, a balaclava or face mask, and silk liners underneath a pair of expedition-style gloves with a couple of chemical hand-warmers in my jacket pockets. I personally own the Heat 3 Co/Heat 3 Smart Mittens.
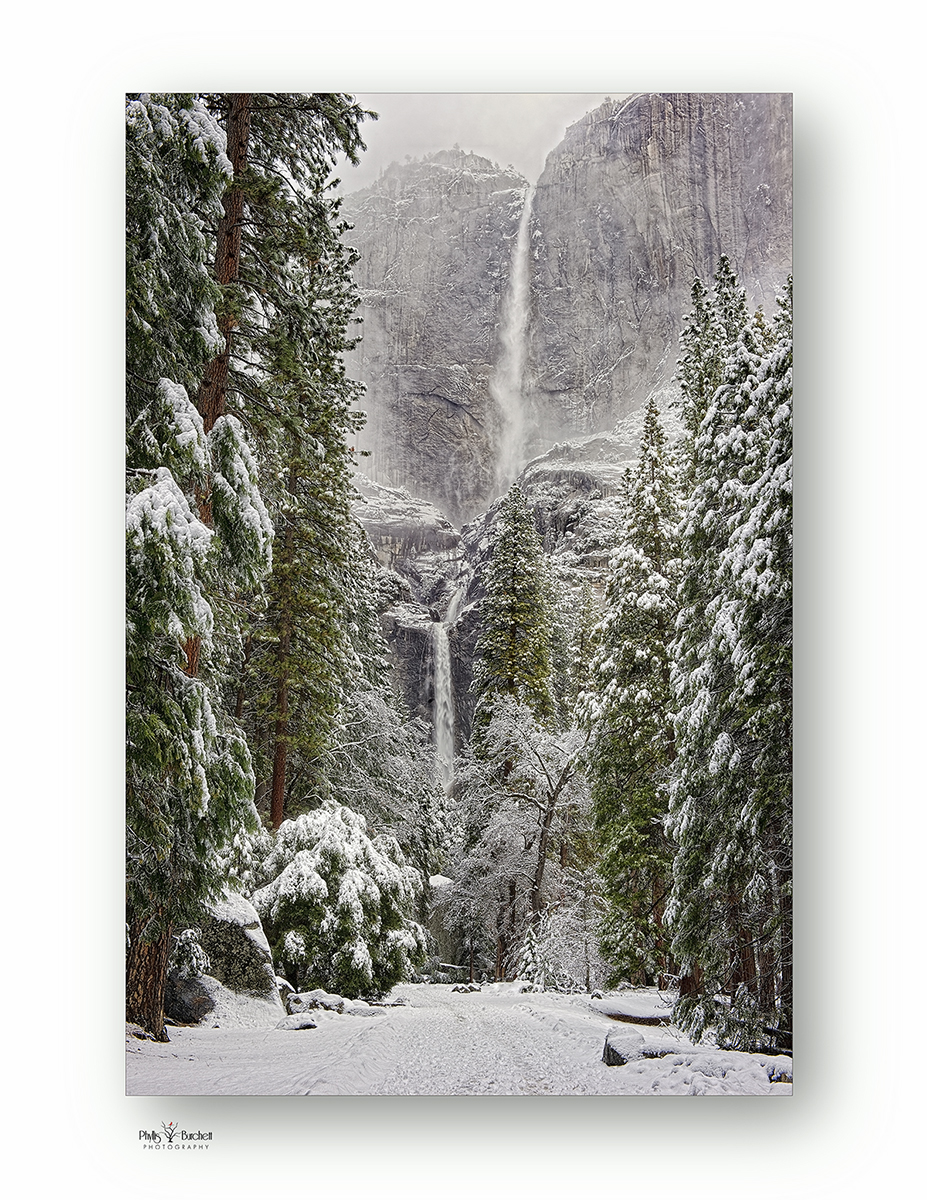
Capture Snow While It’s Still Fresh
There’s nothing like a fresh snowfall. If you want footprint-free snow, you should plan the photos you’re going to take and the order you’ll take them in. That way, hopefully, you’ll eliminate tracks!
Try Snow Photography at Sunrise or Sunset
Adding a sunset or sunrise to your snow photography can be a really effective addition. As we’ve already mentioned, for really bright white snow photography, sunlight shining directly onto the snow is a big help.
So, when shooting a sunrise or sunset, expect a more warm or blue hue to your images. Don’t fight against it too much, go with it and take a natural image of the sun rising or setting, with the addition of a stunning snowy landscape.
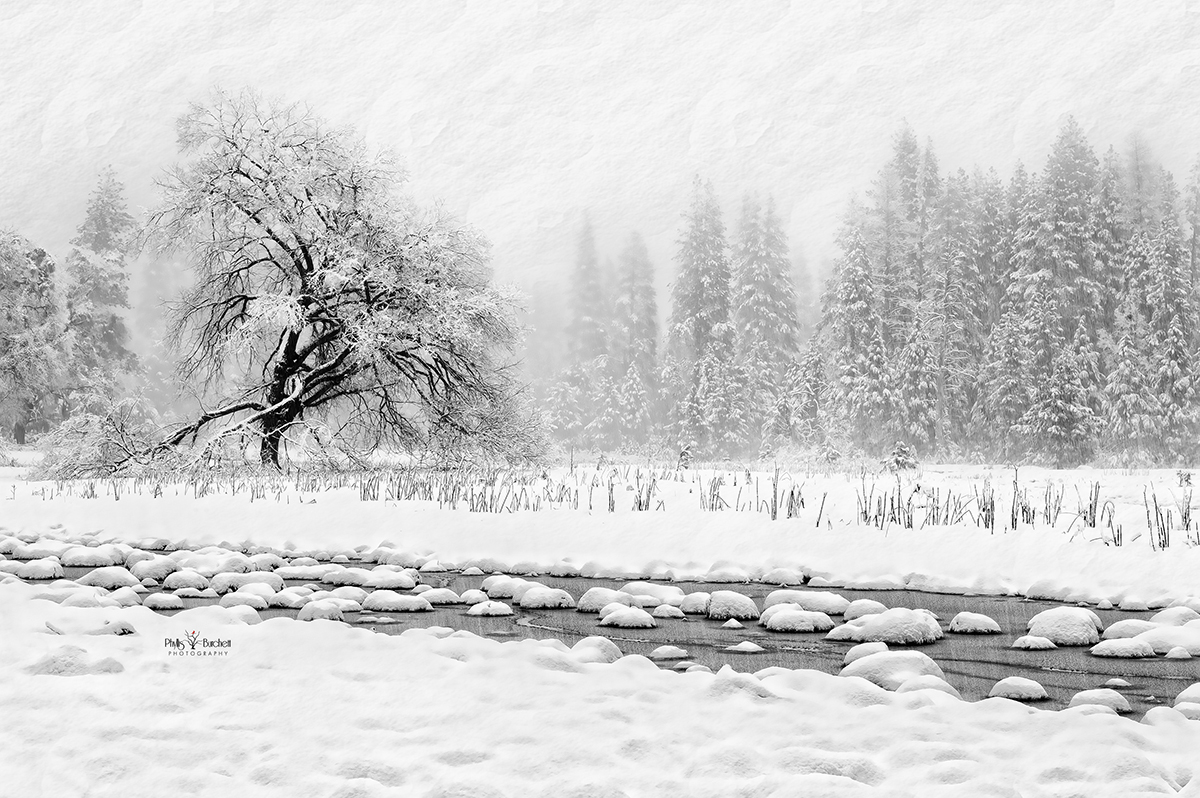
Try Black and White Conversions for a Stunning Snow Photo
Think about converting your snowy photos to black and white. Of course, I use Nik Silver Efex for all my black and white conversions. So many presets to choose from but I always play around with the sliders to get my best image.
Please send winter guide.
Thanks
Hi Steve, if you sign up for my newsletter you’ll receive a free golden hour guide. I don’t have one for winter, this blog post covers it all though!
Would love any tips and guides you have available. Your work is beautiful and has a story to be told with each one.
Hi Tracy, thanks for the lovely comments! Be sure you are signed up for my weekly newsletter! https://phyllisburchettphoto.net/join-the-herd/ There’s a free Golden House Guide when you sign up. Take care, Phyllis