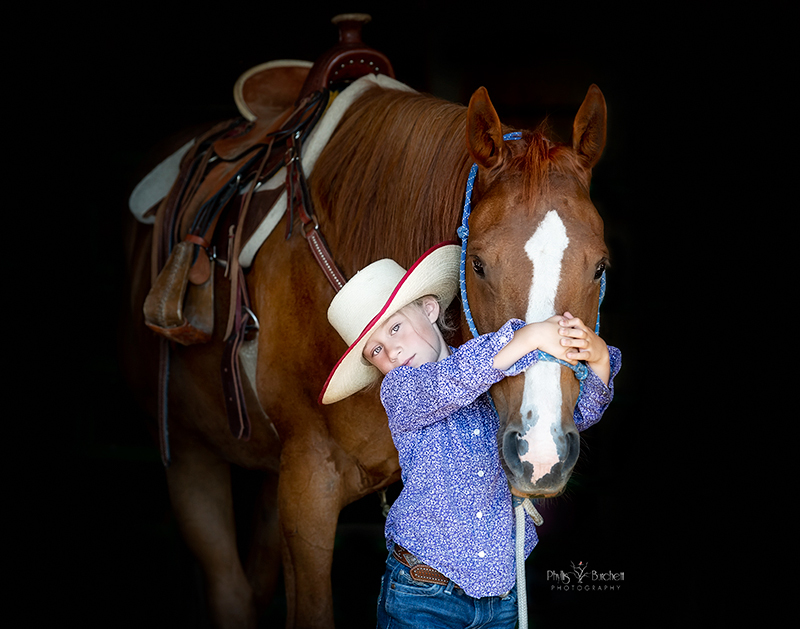
With style and class, black background portraits are a popular request in equine portrait sessions. How do you do it? I’m going to break down the simple way you can design stunning black background portraits.
First, the very basics for doing black background images are simple.
Place the horse in the doorway of a dark barn. Be sure all background doors and windows are closed, lights off. On a rare occasion, I might take a black background to use with me if I’m doing several sessions in a day but I still follow the above rules as light can still leak in.
Place the horse where the natural light will illuminate him/her without any direct light. NO harsh sunlight on your subject! Nice even light is what you’re looking for; cloudy days are even better. Expose for the horse and let the background fall into the shadows. I may even underexpose a tad.
I prefer to keep my aperture between F2.8 and F5 depending on the light, my shutter speed above 1/250th but I like to have 1/500th if I can. I will try and keep my ISO as low as the conditions will allow.
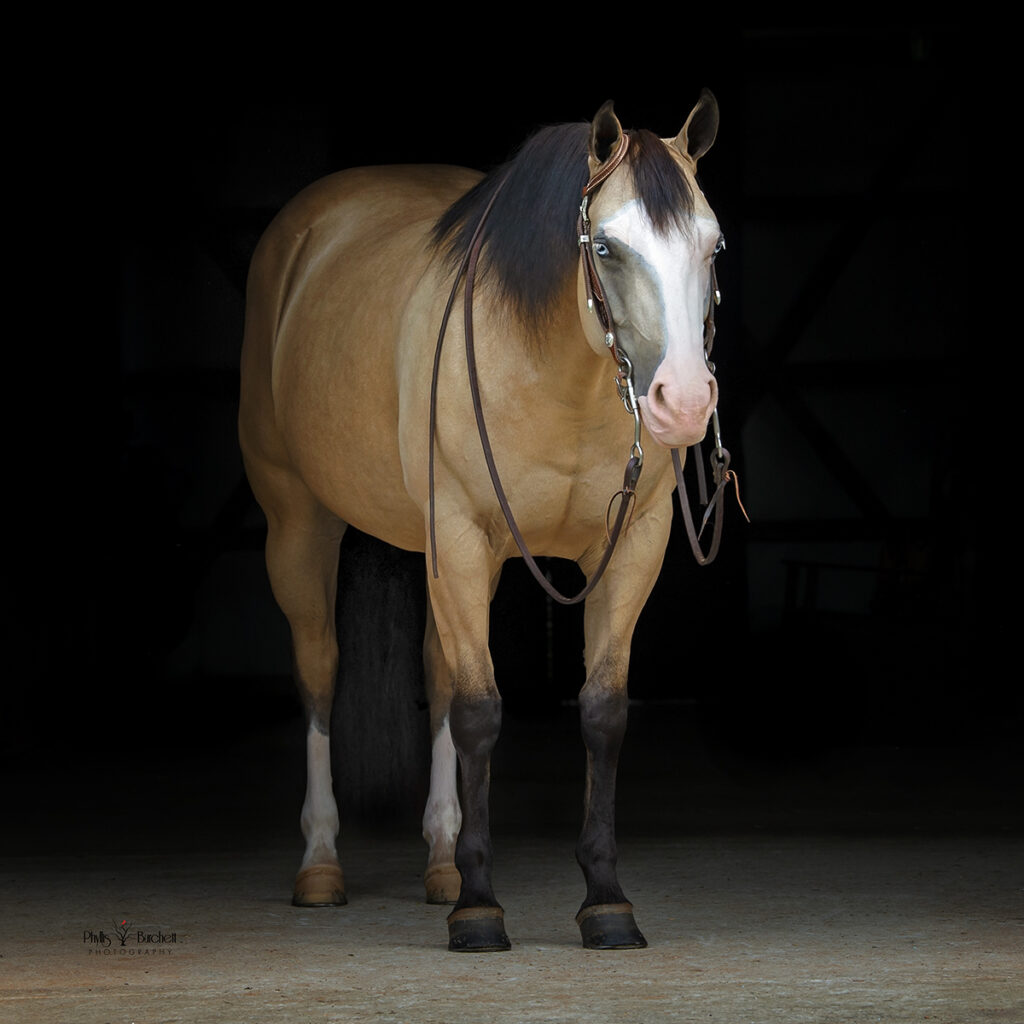
As much as possible I’d like to get things right in camera, but sometimes it’s not always possible. Once you get the images on the computer you will still need to clean up the background, feather your light to ensure there are no hard edges. I usually use a Levels Layer to ensure I have a true black background.
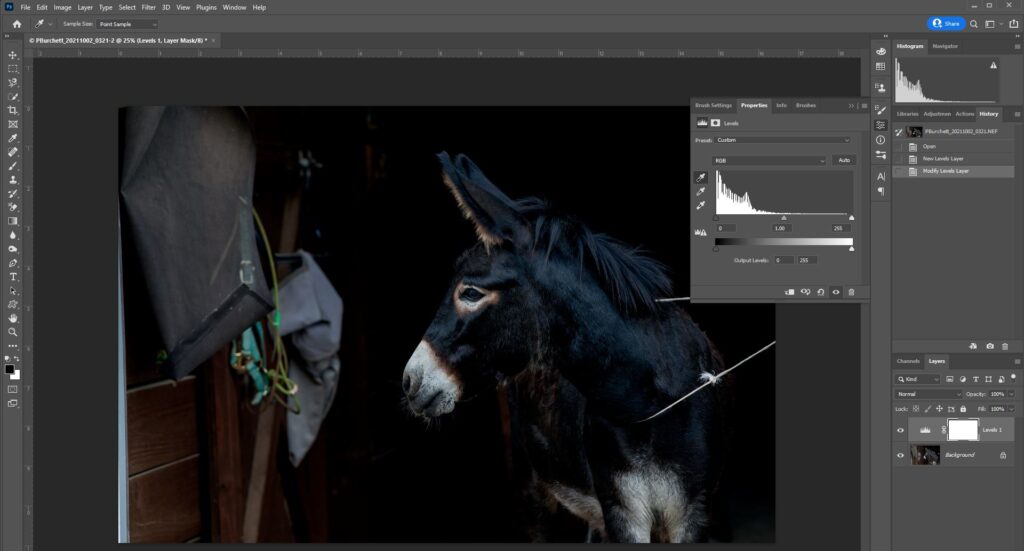
There are a couple of ways to create a Layer for a Levels adjustment, but I’ll keep it simple: go to Layer > New Adjustment Layer > Levels, then click on the top eyedropper tool to set your black point:
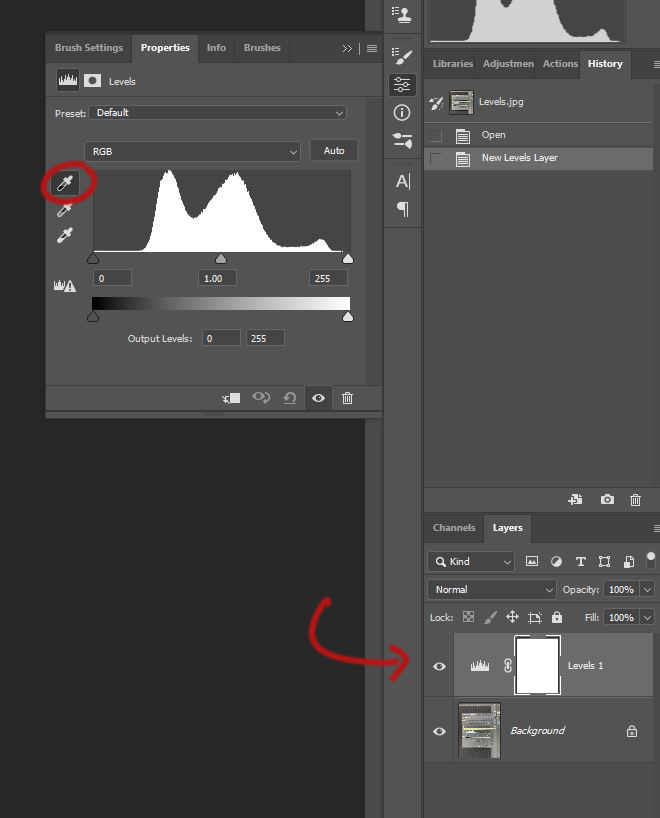
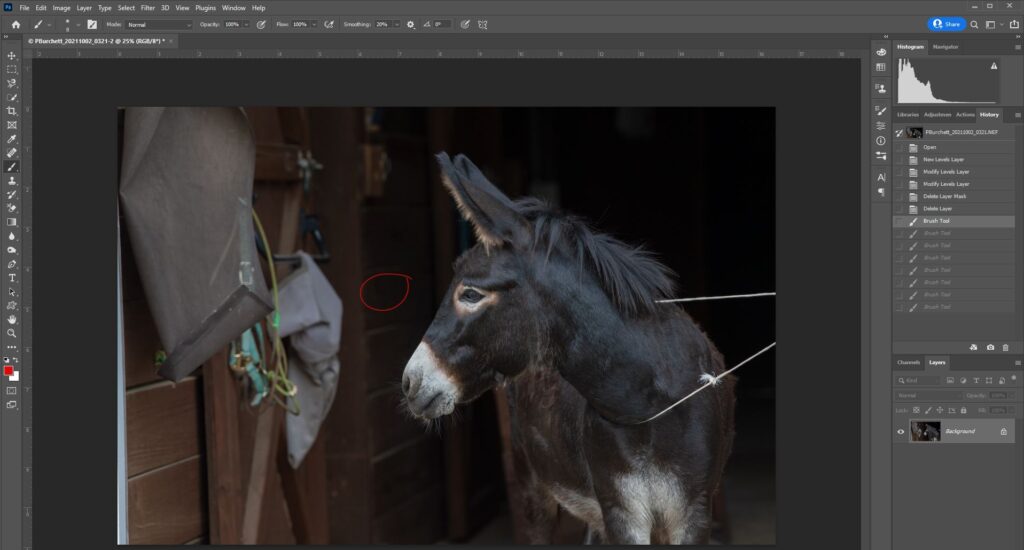
I could choose the area where the items are hanging on the left but for the example below I’ve chosen to make my final image square so I click the area I’ve circled red:
Here is the result:
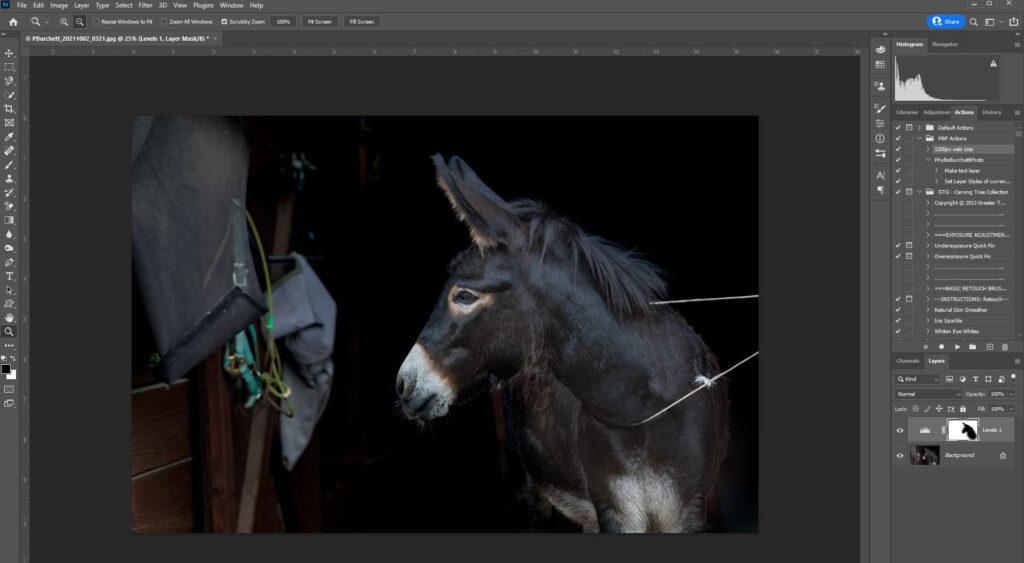
I then use a black brush with my layer mask selected and paint away the adjustment on the subject, Take care to not paint away or remove any whiskers, eyelashes, mane or hair around the ears. You may need to lower your opacity to feather these areas so the background remains black.
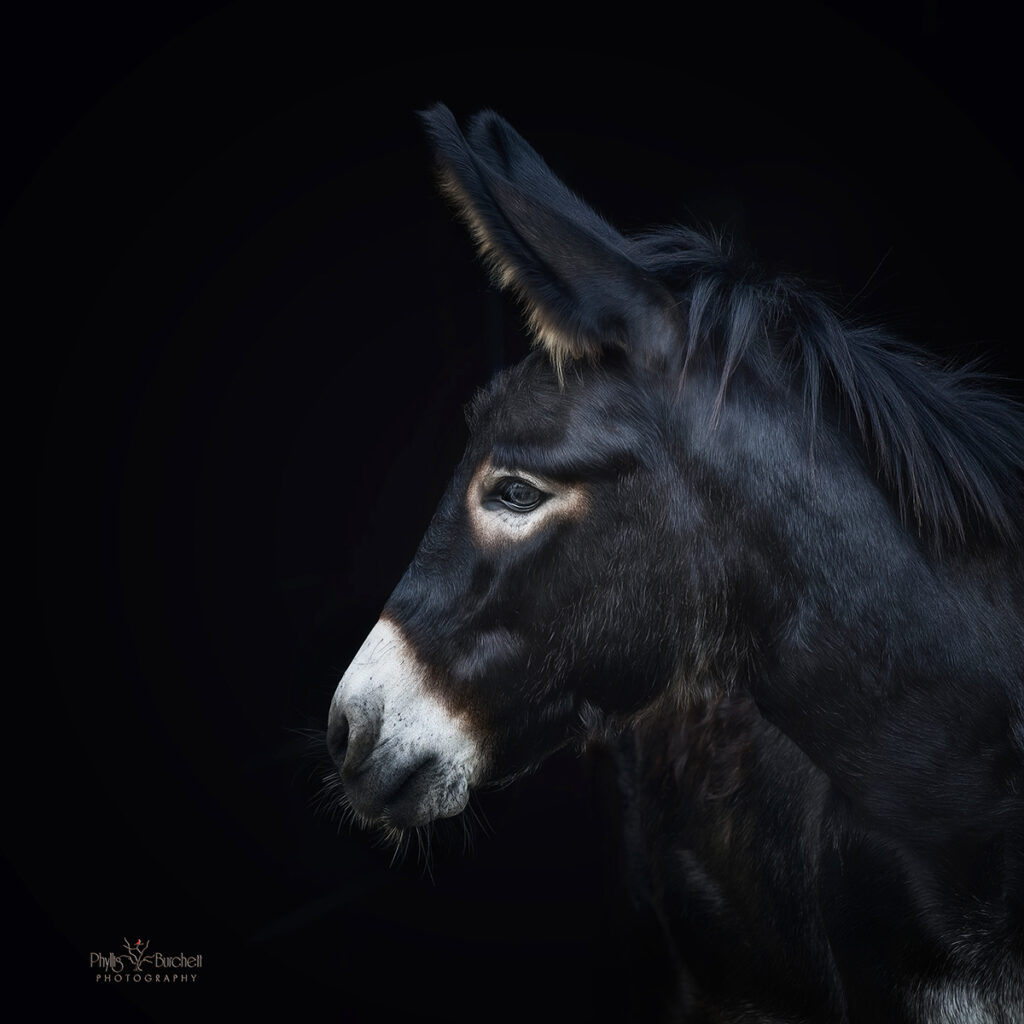
I chose this image as an example because sometimes your subject may be less than cooperative and you will just have to adjust. Maya, this beautiful black donkey, started out in the center of the aisle but she refused to stand still so I took what I could get for my client!
Next, I will go in and do my final adjustments. I choose the eyedropper tool to match the black when I paint away the elements on the left.
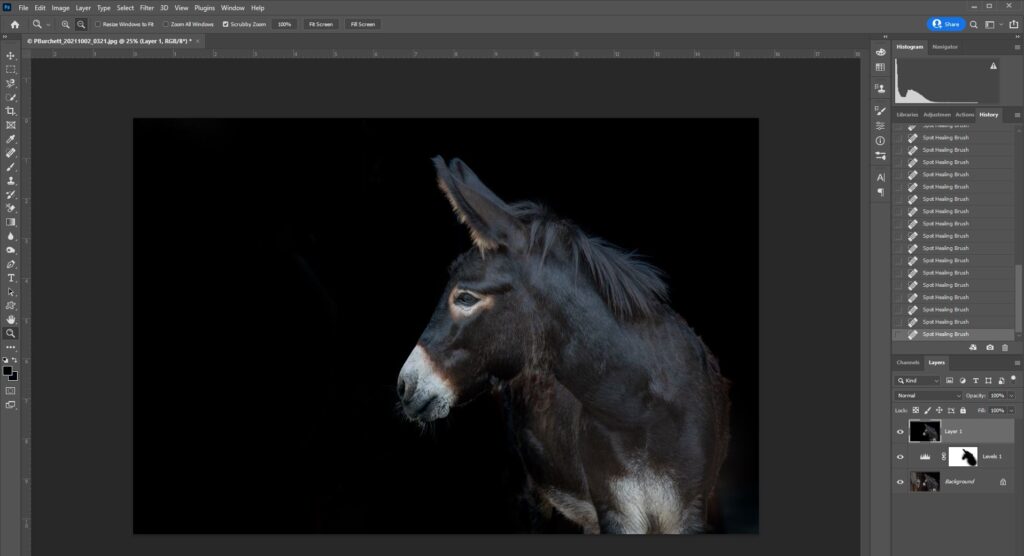
I may use Nik Color Efex Pro Tonal Contrast or a Dodge/Burn Layer to bring out highlights and shadows.
Be sure to work the eyes to bring out color and catchlights. Fix any odd color casts to make sure the color of your image is true to your subject.
If you don’t want the horse to have a bridle or halter on, some will stand still for you to snap quickly, especially if you’re using something to get their ears up to keep their attention. Just be careful not to scare or excite your subject which may cause them to want to exit the area! You can also use a thin halter that’s easy to clone out, or a hay string around the neck works well for some.
This is just one way to create a seamless black backdrop. Let me know how it works for you!
A few more examples for you:
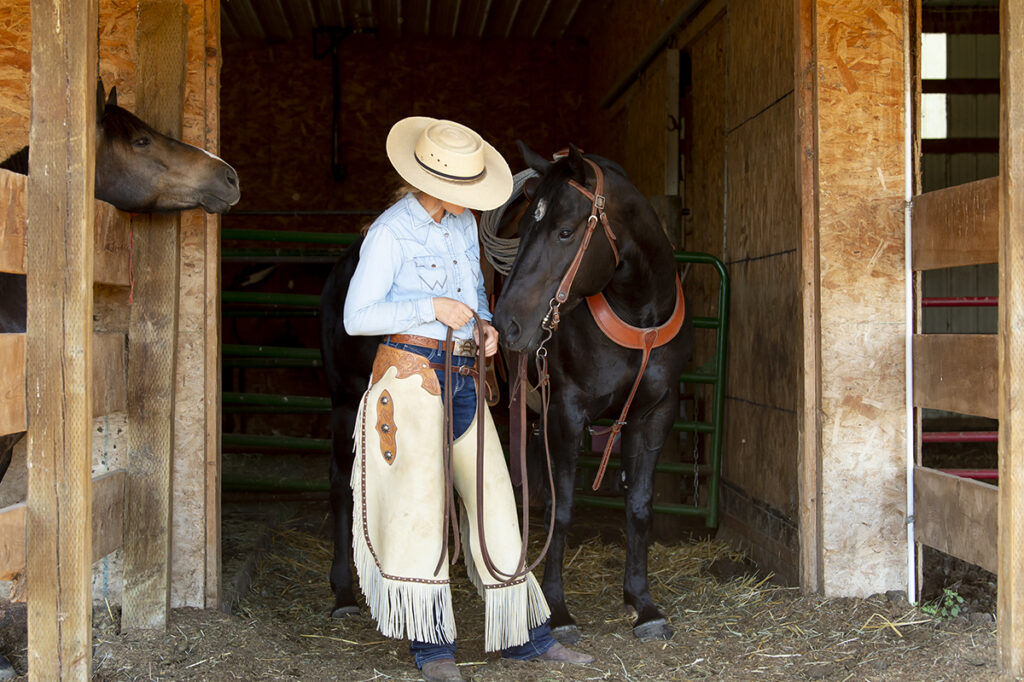
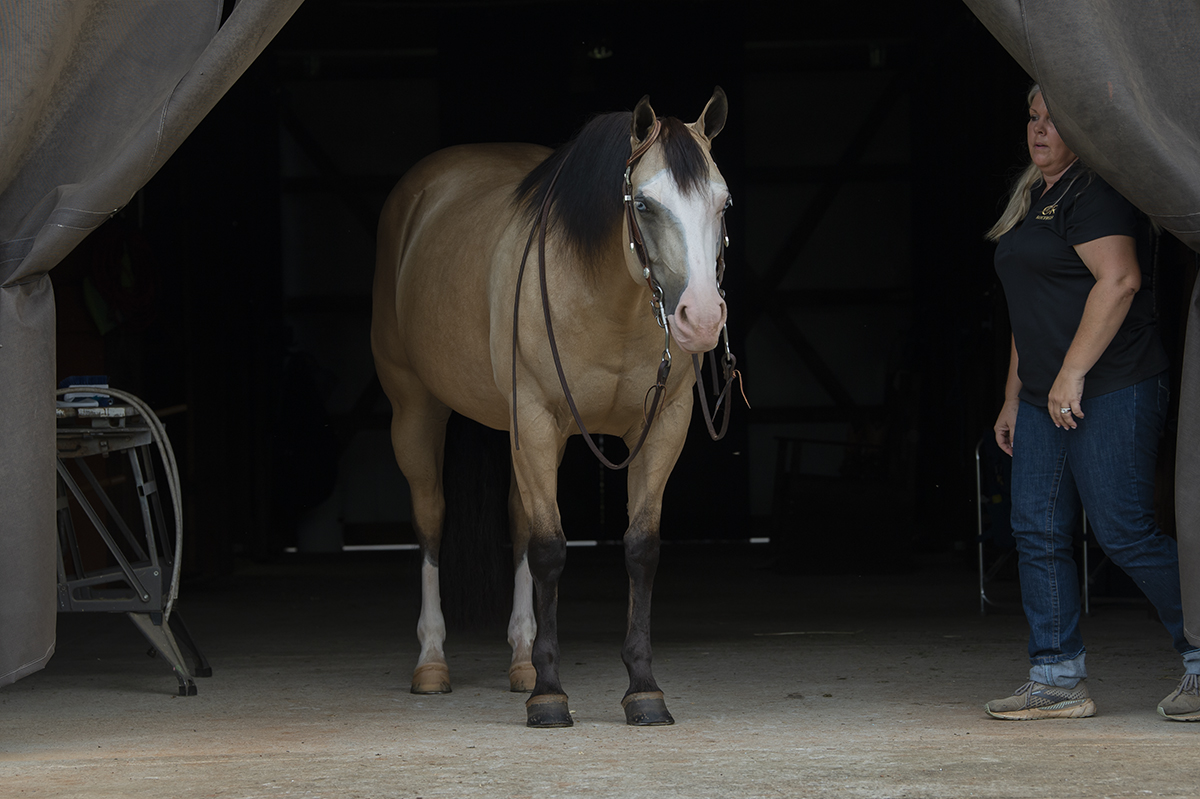
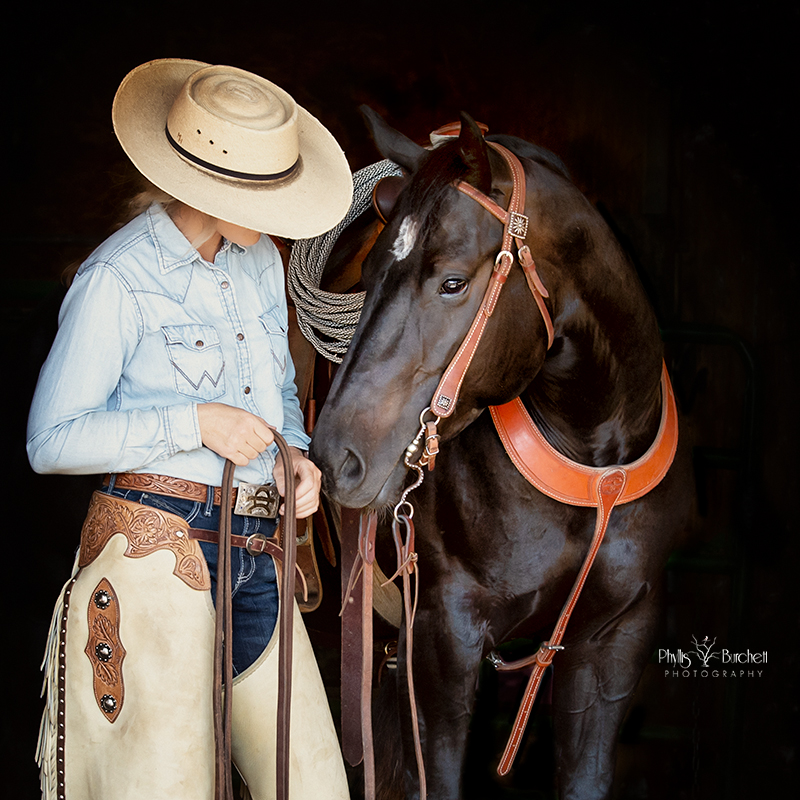
Before Image SOOC (Straight out of the Camera)
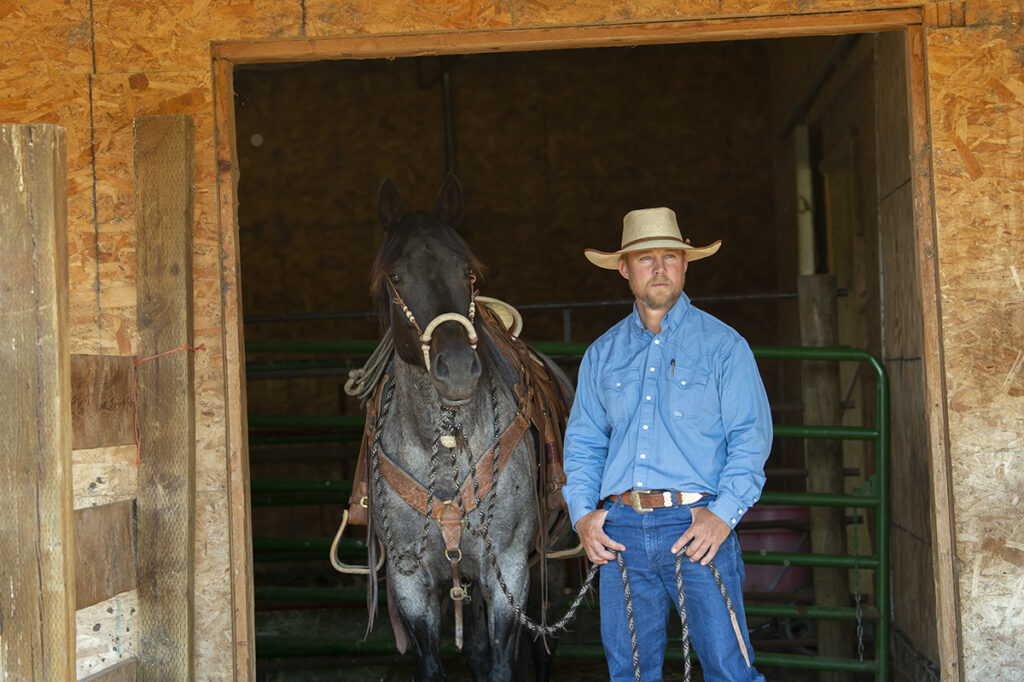
Before SOOC (Straight out of the camera)
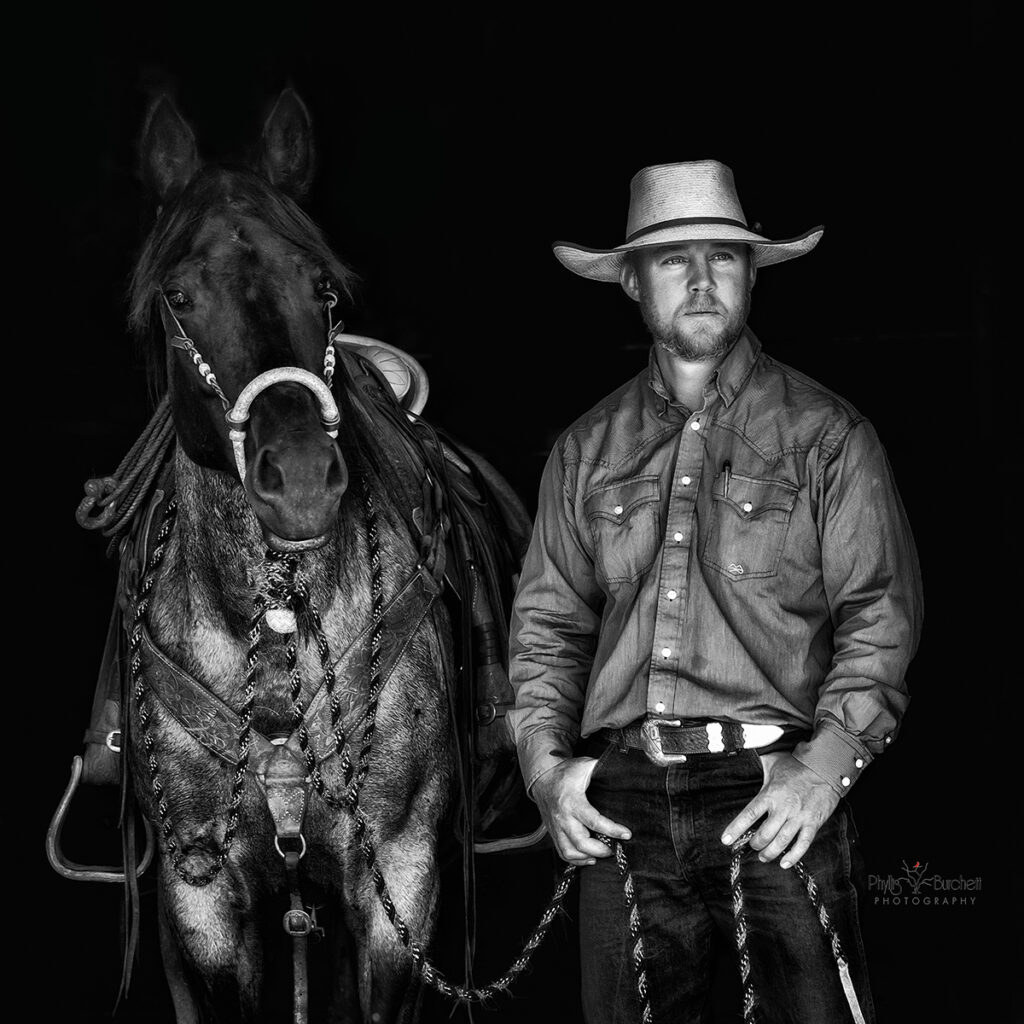
Don’t forget Black and White!
Wow ! You’re who I want to be when I grow up ! Mad skills !! Thank you for sharing
Hi Tami, awwww….you’re too sweet, thanks so much! Glad you enjoyed the tutorial! Phyllis
thank you so much for taking the time to put this together and share with us!
Hi Cathy, you are very welcome! Glad you were able to get some good information from the tutorial, if you have any questions let me know! PB
Absolutely stunning! Thank you for the great information. What software/application are you using for this?!
Thank so very much! I’m using Adobe Photoshop exclusively.
I’ve always admired you and your work. And I thank you for sharing you experience and knowledge to the community!! You have such a humble kind spirit!
Hi Sonja, What a lovely thing to say, thank you so very much for the wonderful comments….so very much appreciated! Phyllis